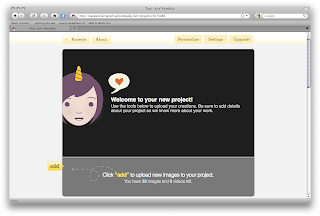
 Inside your Carbonmade backend page, you can create your projects simply by clicking the 'Add a project' button. Inside the project it’s simple to add image files by clicking the ‘add’ button (everything is spelled out pretty well for the user.)
This brings up the familiar file selection window, and it only allows the user to select the supported file types. Once the image has uploaded, you can give it a caption, describing what it is.
Scrolling down you can edit details about your project, including the title, the description, and the client it was done for, among others. You can also change the layout of the project as seen by those viewing it.
Scrolling back to the top of the page there is a personalize tab, in which the user has a few options with which to further customize their portfolio, such as if they want a black or white color scheme, and if they want a serif or sans serif type face.
Back on the projects tab, each of the projects will appear, using the first loaded image as the default thumbnail; this can be easily changed with a click of a button and the selection of a new image. When you’re done loading you images, to view your online portfolio simply click the link at the top left of the page.
This is the portfolio that others will see when you share your link with them. From there the person can click on which project they want to view, which leads them to a gallery of the work you have uploaded.
And it really is that easy to get a free and simply portfolio on the Web.
On a side note, a similar website I found is MyFolio.com. While working with this site, I actually felt it offered more and better options, however it is currently being upgraded, and the ability to publish one’s portfolio is working, thus rendering the site (temporarily hopefully) essentially useless. I will be keeping an eye on MyFolio, and if it begins to function properly, I will probably make the transition to it.


No comments:
Post a Comment